How to create a Document-Specific Template?
To create a document specific template, you must
first navigate to the ‘Templates’ tab and select the ‘Create’
button.
·
Here, all 4 template types will be displayed. Click
on the ‘Document Specific’ tile.
Thereafter, please follow the below steps to proceed with
your template creation.
Upload a File
Assign Recipients

Add Tools
Complete the Workflow and Send the
Document
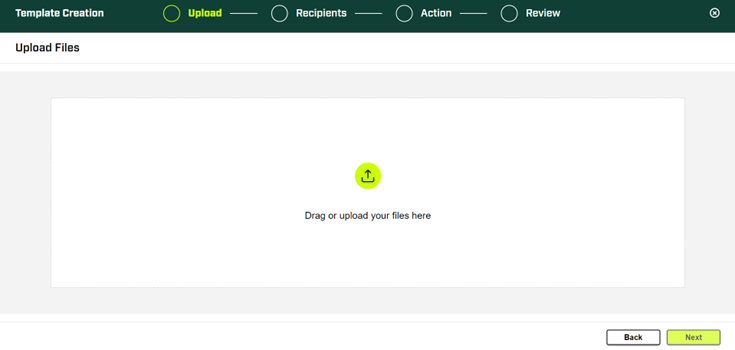
Upload a File
- Select the file
required, from the ‘Upload’ section.
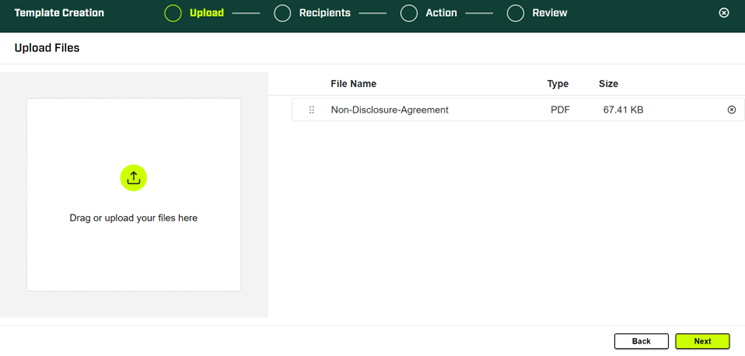
- Once the required file is selected, the file details will be displayed.
- Multiple files can be uploaded by selecting the ‘Upload’ icon again.
- Any uploaded documents can be deleted by
simply selecting the ‘Delete’ icon after the
document
- Once the desired documents are uploaded, select the ‘Next’ button to move on to the next step of adding recipients.
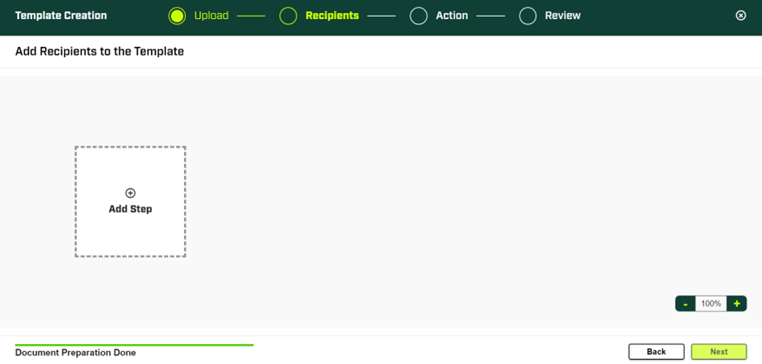
- The document upload status will be displayed at the bottom of the ‘Add recipients’ page.
- There are three different upload status
types. The final one is ‘Document Preparation Done’.
Assign Recipients
- Select the ‘plus’ icon displayed inside
the ‘Add step’ box.
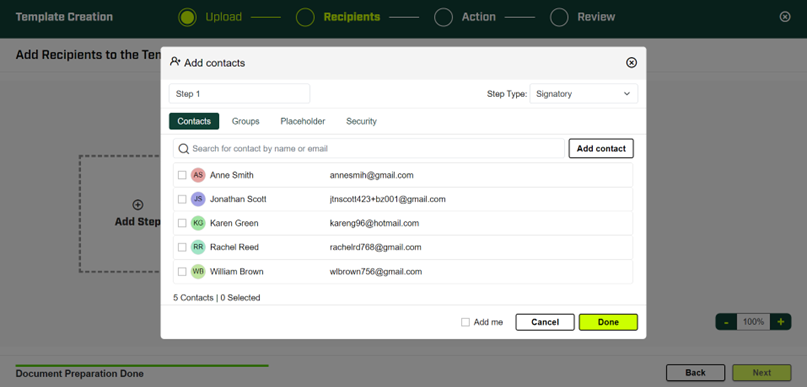
- All address book contacts will be displayed within the ‘Add Contacts’ pop up.
- Select the Contact required. The option to select multiple contacts for each step is available.
- New contacts can be added, by selecting the ‘Add Contact’ option.
- Originators
can add themselves to the workflow by selecting the ‘Add
me’ checkbox.
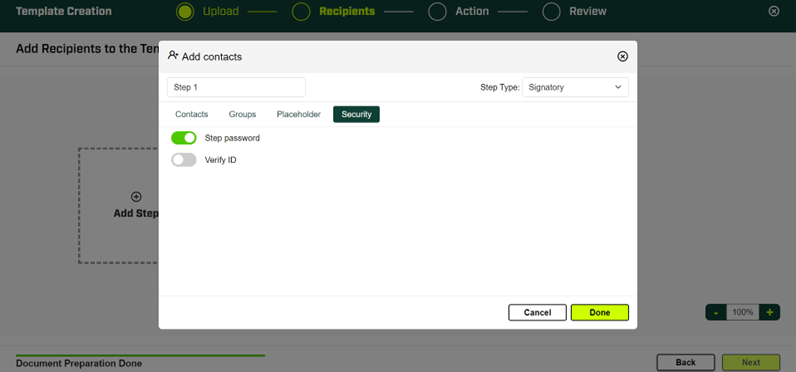
- If you wish to enable a password for each step, navigate to the ‘Security’ tab and enable the step password toggle.
- Here you can
enable ‘Verify ID’ to have a second form of user confirmation
(Knowledge based authentication).
- Once all required contacts have been selected, click on the ‘Done’ button.
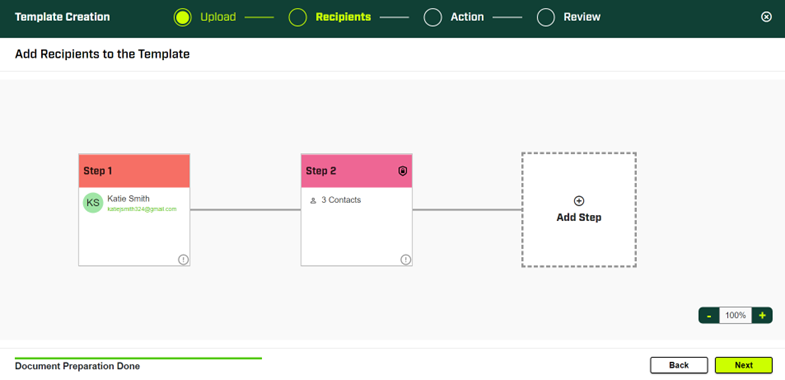
- The contacts
added will display within the step box.
- If multiple
contacts are assigned to a step, those contacts’ details can be viewed by
selecting the ‘Info’ icon within each
box.
- Once all
recipients have been added, select the ‘Next’ button.
Selecting this will allow you to move on to the next step of adding tools
to the template.
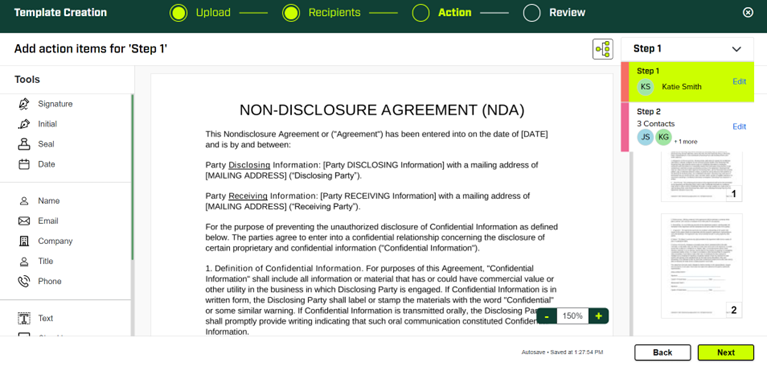
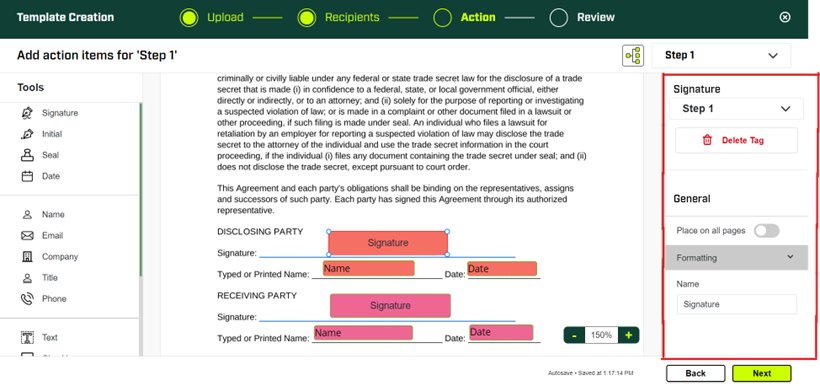
Add Tools
- From your opened document, a Toolbar will be displayed with all the available tools that can be added to your document.
- Opening the
drop-down menu, select the required step to which you wish to add a tool.
The first step will be selected by default.
- Each step must include at least one tool to complete workflow.
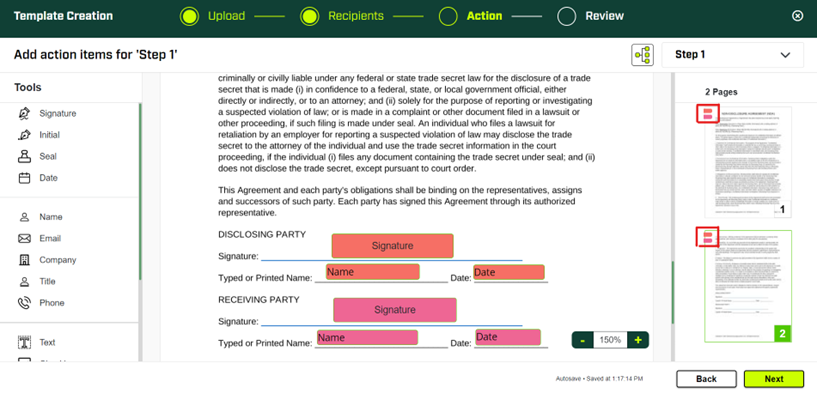
- To add a tool, drag and drop the required tool to place it within your document.
- Size of the added tool can be adjusted as required.
- Each tool is
color-coordinated according to the step to which it was added. The
document preview displays color-coded tags on the pages where tools have
been added.
- The tools added can also be edited. To do so, select a tool to open its properties panel.
- The selected tool can be deleted or renamed as required.
- Each tool
has properties that can be defined or edited.
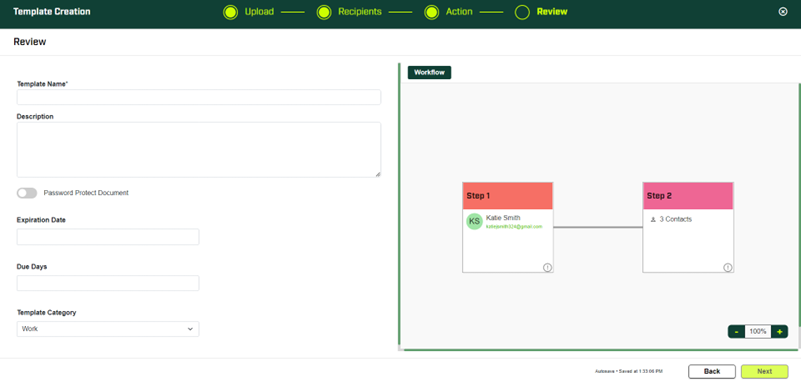
Complete the Workflow and Send the
Document
- Once the document has been created and 'Next' is selected, a review page will be displayed, with a few fields to be filled out.
- The ‘Name’ field is mandatory. The ‘Next’ button will be disabled until this field is updated.
- To Password protect your document, enable the ‘Password Protect Document’ toggle.
- Expiration Date’ is optional, and that date can be selected from a calendar pop-up. Select the year, month, and date if the document requires an expiration date.
- 'Due Days’ is also optional. If needed, enter the number of days by which the template is due.
- 'Template Category’ can be selected from the dropdown. Available options are ‘Work’ and ‘Personal’. Based on this category, your template will display within the Template List.
- A preview of the entire document workflow appears on the right side of your screen. The option available to zoom in and out this preview
- Selecting ‘Next’ will
send the created document to your first assigned recipient.
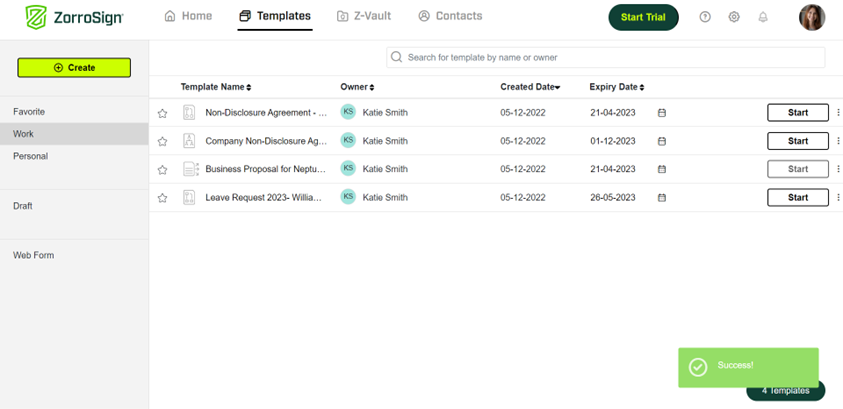
- The created Template can now be
found and tracked within your Template list.
Related Articles
How to create a User-Specific Template?
To create a user specific template, you must first navigate to the ‘Templates’ tab and select the ‘Create’ button. Here, all 4 template types will be displayed. Click on the ‘User Specific’ tile. Thereafter, please follow the below steps to proceed ...How to create a Bulk Send Template?
To create a document specific template, you must first navigate to the ‘Templates’ tab and select the ‘Create’ button. Here, all 4 template types will be displayed. Click on the ‘Dynamic’ tile. Thereafter, please follow the below steps to proceed ...How to create a Dynamic Template?
To create a dynamic template, you must first navigate to the ‘Templates’ tab and select the ‘Create’ button. Here, all 4 template types will be displayed. Click on the ‘Dynamic’ tile. Thereafter, please follow the below steps to proceed with ...How to create a Bulk Sign document?
Follow the steps below to create a bulk sign document on your own. First, navigate to ‘Z-Vault’ and click ‘Create’ to start creating a bulk sign document. Then select the ‘Bulk Sign’ tile and click ‘Next’ Now you can upload the files you want to ...How to create a Quick Sign Document?
First, navigate to ‘Z-Vault’ and click ‘Create’ to start creating a quick sign document. Then select the ‘Quick Sign’ tile and click ‘Next’ Now you can upload the files you want to process. Upload a File Select the file required, from ...